A maintenance engineer’s guide to the 11-character model code, the cross-reference table for T6C / T6D / T6E, and the mechanical + hydraulic installation procedure that prevents the four most common premature failures.
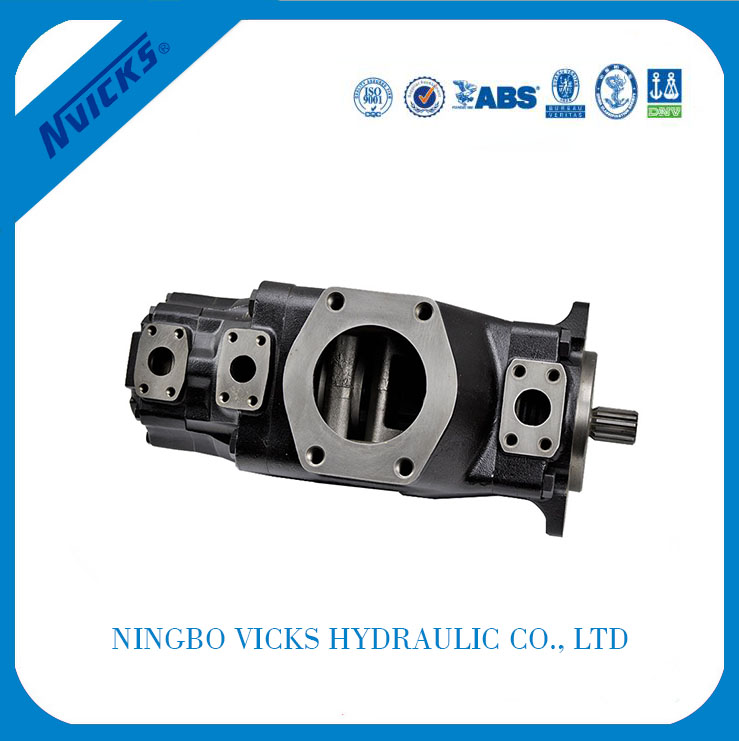
TL;DR
- A Denison T6 vane pump replacement is not a single SKU — the 11-character model code specifies displacement, shaft type, rotation, port position, and seal level, and any one mismatch causes the pump to fail within hours of startup.
- The Denison T6, T6C, T6D, and T6E designations cover different displacement classes; T6C spans 10-28 cc/rev, T6D spans 36-61 cc/rev, and T6E spans 66-86 cc/rev, all sharing the same SAE mounting interface.
- Vicks Hydraulic’s Veljan T6C/T6D/T6E series are dimensionally and hydraulically interchangeable with the original Denison T6 series at a fraction of the lead time for OEM spare parts.
- The 40-hour break-in procedure is the most commonly skipped step in T6 replacement: running at full pressure immediately destroys the vane tips before they have seated against the cam ring.
- Shaft alignment tolerance of 0.05 mm or better is required at installation; misalignment of more than 0.15 mm causes premature bearing failure and shaft seal leakage within 3,000 operating hours.
The most expensive mistake in a Denison T6 vane pump replacement is buying a pump that looks right on the outside but has the wrong displacement, the wrong shaft, or the wrong rotation. The pump arrives, the maintenance team bolts it in, and within 100 operating hours the vanes are gone. We see this failure mode several times every quarter.
It is completely avoidable, because the Denison T6 model code is a structured 11-character string that defines every critical parameter. Once you can read the code, you can verify a replacement in 30 seconds and you can have a productive conversation with a cross-reference supplier. The difference between a 5-year service life and a 3-month service life is almost always a model code mismatch, a missed break-in procedure, or a contaminated system at startup.
This guide walks through the complete replacement process: how to read the nameplate, the cross-reference table for the T6C / T6D / T6E frames, what to verify before you order, the mechanical and hydraulic installation procedures, and the 40-hour break-in that protects your investment.
Why Replace a Denison T6 Instead of Repairing It?
The decision to replace rather than repair comes down to three failure modes, and each has a different cost-benefit profile.
Loss of volumetric efficiency. The pump runs but the system pressure drops under load, or the cycle time has slowed. This is almost always vane wear or cam ring wear inside the cartridge kit. If the shaft, bearings, and housing are within tolerance, a cartridge kit replacement restores the pump to new condition at 30 to 40 percent of the cost of a complete pump.
Shaft seal leakage. Oil is visible at the shaft seal, or the case drain flow has increased above 1 L/min at operating temperature. Shaft seal failures usually indicate either seal degradation (replaceable) or shaft wear at the seal journal (requires complete pump replacement because the shaft is not normally supplied as a service part on older T6 models).
Bearing failure. The pump is noisy, the shaft has measurable axial or radial play, or the housing shows signs of overheating discoloration. Bearing failure usually contaminates the entire pump with metallic debris. At this point a complete pump replacement is the only safe option, and the system must be flushed before the new pump is installed.
Before you decide, remove the pump and inspect the shaft, the housing bore, and the case drain flow. A quick inspection takes 15 minutes and tells you whether you need a cartridge kit, a complete pump, or a pump plus a system flush.
Reading the T6 Nameplate: The 11-Character Code Explained
The Denison T6 nameplate encodes every parameter that determines fit, function, and operating life into an 11-character alphanumeric string. Once you understand the structure, you can decode any T6 pump in the field, including pumps that have been repainted or whose nameplate is partially obscured.
The code structure is: T6X-DDD-S-RR-PP-N where each position has a defined meaning.
Position 1-2: T6 — the series family (high-pressure dowel-pin vane pump).
Position 3: Frame — C for small frame (10-28 cc/rev), D for mid frame (36-61 cc/rev), E for large frame (66-86 cc/rev). The frame determines the bearing size, the shaft diameter, and the port thread size, so a wrong frame will not physically mount on the same bracket.
Position 4: Configuration — N for industrial mounting, M for truck (mobile) mounting, P for truck with double seal kit. The mobile variants have additional sealing for harsh environments.
Position 5-7: Displacement code — three digits representing the displacement in cc/rev divided by 1. For example, displacement code 014 means 14 cc/rev, and displacement code 061 means 61 cc/rev. The displacement code determines the flow output at a given shaft speed.
Position 8: Shaft type — keyed, splined, or tapered. The shaft type must match the coupling or drive interface on the existing installation. Splined shafts are common in mobile applications; keyed shafts are common in industrial applications.
Position 9-10: Rotation — R for right-hand (clockwise viewed from the shaft end), L for left-hand (counter-clockwise). The rotation is critical because the port logic reverses between R and L versions. A pump running in the wrong direction will cavitate within minutes.
Position 11: Port position — 00 (opposite inlet), 01 (inline with inlet), 02 (90° CCW from inlet), 03 (90° CW from inlet). The port position must match the existing plumbing layout; reconfiguring the port position requires moving the hoses or pipes, which adds cost and risk.
Position 12: Design number — Vicks uses A1 as the current production design; older designs are A0 and A99. For replacement purposes the design number does not usually matter, but for service parts the design number ensures the correct cartridge kit is ordered.
Position 13: Seal level — 1 for S1 nitrile rubber (standard mineral oil), 5 for S5 fluorocarbon (high-temperature or phosphate ester fluid). The seal level must match the fluid chemistry; nitrile seals in phosphate ester fluid will fail within hours.
A complete example: T6C-014-1R00-A101 reads as T6 series, C frame, industrial mounting, 14 cc/rev displacement, keyed shaft, right-hand rotation, port position 00, design A1, S1 nitrile seals. That single string tells you every parameter you need to order the correct replacement.
Cross-Reference Table: Denison T6 to Vicks/Veljan T6C T6D T6E
The Veljan T6C, T6D, and T6E series are dimensionally and hydraulically interchangeable with the original Denison T6 series. A Veljan T6C-014-1R00-A101 is a direct replacement for a Denison T6C-014-1R00-A101, with the same mounting footprint, the same port locations, the same shaft interface, and the same performance envelope.
| Denison T6 Code | Veljan/Vicks Code | Displacement (cc/rev) | Max Pressure (bar) | Typical Speed Range (rpm) |
|---|---|---|---|---|
| T6C-003 | T6C-003 | 10 | 175 | 600-1800 |
| T6C-005 | T6C-005 | 12 | 175 | 600-1800 |
| T6C-006 | T6C-006 | 16 | 175 | 600-1800 |
| T6C-008 | T6C-008 | 21 | 175 | 600-1800 |
| T6C-010 | T6C-010 | 26 | 175 | 600-1800 |
| T6C-012 | T6C-012 | 31 | 175 | 600-1800 |
| T6C-014 | T6C-014 | 36 | 175 | 600-1800 |
| T6D-014 | T6D-014 | 36 | 175 | 600-1800 |
| T6D-017 | T6D-017 | 45 | 175 | 600-1800 |
| T6D-020 | T6D-020 | 52 | 175 | 600-1800 |
| T6D-024 | T6D-024 | 61 | 175 | 600-1800 |
| T6D-028 | T6D-028 | 73 | 175 | 600-1800 |
| T6D-031 | T6D-031 | 79 | 175 | 600-1800 |
| T6D-035 | T6D-035 | 89 | 175 | 600-1800 |
| T6D-038 | T6D-038 | 97 | 175 | 600-1800 |
| T6D-042 | T6D-042 | 108 | 175 | 600-1800 |
| T6D-045 | T6D-045 | 117 | 175 | 600-1800 |
| T6D-050 | T6D-050 | 130 | 175 | 600-1800 |
| T6E-042 | T6E-042 | 108 | 175 | 600-1800 |
| T6E-045 | T6E-045 | 117 | 175 | 600-1800 |
| T6E-050 | T6E-050 | 130 | 175 | 600-1800 |
| T6E-052 | T6E-052 | 137 | 175 | 600-1800 |
| T6E-057 | T6E-057 | 150 | 175 | 600-1800 |
| T6E-062 | T6E-062 | 163 | 175 | 600-1800 |
| T6E-066 | T6E-066 | 175 | 175 | 600-1800 |
| T6E-072 | T6E-072 | 190 | 175 | 600-1800 |
| T6E-085 | T6E-085 | 225 | 175 | 600-1800 |
The cross-reference is one-to-one at the model code level. When you send Vicks the model code stamped on your old pump’s nameplate, we deliver a replacement that mounts on the same bracket, plumbs into the same ports, and runs at the same performance envelope. The cross-reference is not approximate; it is a direct replacement.
What to Verify Before You Order a Replacement
Three checks eliminate 90 percent of the wrong-pump-sent-back scenarios.
Check 1: Confirm the full model code on the nameplate. Do not rely on a part number from a previous purchase order or a verbal description from the maintenance team. Read the 11-character code directly from the nameplate, including the rotation (R or L), the port position (00, 01, 02, or 03), and the seal level (1 or 5). If the nameplate is unreadable, open the pump and measure the displacement code stamped on the cartridge.
Check 2: Verify the rotation by spinning the shaft. With the pump removed from the system, rotate the shaft by hand and observe the direction. Right-hand rotation (R) means the shaft turns clockwise when viewed from the shaft end. If you cannot easily spin the shaft (because of internal damage), the old pump has internal issues that may have been the failure cause. Replace the cartridge or the complete pump before the same failure mode destroys the replacement.
Check 3: Inspect the existing coupling and mounting bracket. The new pump must mate correctly to the existing drive. Verify the shaft type (keyed, splined, or tapered) and the shaft diameter. Verify the SAE mounting flange bolt pattern matches. If the bracket has been modified or the coupling is worn, replace those parts at the same time as the pump.
When you have verified all three, send the model code to your replacement supplier along with a photo of the nameplate. The supplier should be able to confirm the exact replacement in writing before you place the order.
Mechanical Installation: Shaft Alignment, Coupling, and Mounting
The mechanical installation is where most premature failures start. A misaligned shaft, a soft-mount bracket, or a contaminated coupling hub will destroy a new pump faster than any operating condition.
Shaft alignment is the single most important step. Use a dial indicator or laser alignment tool to verify the total indicated reading (TIR) at the coupling is less than 0.05 mm. Misalignment of 0.15 mm or more causes the bearing to fail in 3,000 operating hours; misalignment of 0.30 mm or more can fail the bearing in less than 1,000 hours. A straightedge is not an alignment tool — use a dial indicator or a laser system.
Verify both angular and parallel alignment. Angular misalignment (the two shafts at an angle) and parallel misalignment (the two shafts offset sideways) are independent failure modes and both must be within tolerance.
Mounting surface flatness matters. The SAE mounting flange must sit flat against the bracket. Use a straightedge and feeler gauge to check the flange surface; if the gap exceeds 0.05 mm across the mounting diameter, the bracket must be machined flat or replaced. Mounting on an uneven surface distorts the pump housing and creates binding between the rotor and the cam ring.
Use the correct bolt grade (typically 8.8 or 10.9 steel) and torque to the manufacturer’s specification. Over-torquing distorts the housing; under-torquing allows the pump to move under load, accelerating wear. ISO 4391:2022 — hydraulic fluid power — pumps, motors and integral transmissions — performance and test methods defines the standard alignment and mounting procedures that the OEM and the replacement supplier should both follow.
Hydraulic Installation: Flushing, Filtration, and Reservoir Prep
The new pump starts in the same system that destroyed the old one. If the failure mode was contaminated fluid, a complete system flush is non-negotiable before you connect the new pump.
Flush the system before connecting the new pump. Disconnect the new pump’s inlet and outlet lines and connect a flush rig or bypass the new pump with a flushing loop. Circulate filtered fluid through the system for at least 30 minutes at flow rates specified by the system designer. Target cleanliness of NAS 1638 Class 8 or ISO 4406 19/17/14 or better at the end of the flush. Skipping the flush is the second most common cause of premature failure after misaligned shafts.
Replace the inlet strainer and the return filter. If the system uses a 100-micron inlet strainer, replace it. If the system uses a 10-micron or 25-micron return filter, install a fresh element. The cost of a filter element is trivial compared to the cost of destroying a new pump in the first 100 hours.
Fill the pump case with clean fluid before initial startup. The case (drain chamber) of a vane pump must be pre-filled with clean fluid before the first rotation. Failure to pre-fill causes a momentary dry start that wears the vane tips against an unlubricated cam ring. The wear is invisible but it reduces the pump’s service life by 50 percent or more.
To pre-fill, disconnect the case drain line and pour clean filtered fluid into the case through the drain port until fluid appears at the inlet. Reconnect the case drain line and verify the connection is tight before the first start.
Startup and Break-In: The 40-Hour Procedure Most Skippers Get Wrong
The 40-hour break-in is the third most-skipped step in a T6 replacement, and the consequences are silent but severe. The vane tips seat against the cam ring during the first 40 hours of operation. If the pump runs at full pressure during break-in, the vane tips are loaded against an unseated cam ring and wear prematurely. The pump appears to work fine for the first 1,000 hours, then the volumetric efficiency drops because the vane tips are worn and can no longer seal against the cam ring surface.
Step 1: First startup, no load. Start the prime mover and run the pump at 800-1000 rpm with no load and no system pressure. Let the pump circulate fluid for 5 minutes. Listen for unusual noise, check the case drain flow (should be less than 1 L/min at warm operating temperature), and verify the inlet has positive pressure (no vacuum).
Step 2: 30-50 percent rated pressure, first 40 hours. Bring the system up to 30-50 percent of the pump’s rated pressure and run for the first 40 operating hours. This is the break-in period. Do not exceed 50 percent pressure during break-in, even if the system requires more for normal operation. Plan your startup schedule so the break-in period falls during a low-demand period.
Step 3: Full pressure after 40 hours. After 40 operating hours, the vane tips have seated against the cam ring. Bring the system up to full operating pressure and verify the performance matches the original specification. Monitor the case drain flow and the operating temperature for the first 8 hours at full pressure.
The 40-hour break-in is in the installation manual for every T6 series pump we ship. It is also the step most often ignored because the system needs to be running and the maintenance team has other priorities. The cost of skipping the break-in is a pump that needs replacement in 3,000-5,000 hours instead of 15,000-20,000 hours. The cost of doing the break-in is 40 hours of reduced system capacity.
Common Replacement Failures and How to Avoid Them
Across hundreds of T6 replacements we have shipped in the last decade, four failure modes account for more than 80 percent of premature returns.
Failure 1: Vane tip wear within 100 hours. Cause: dry start from an unfilled case, contaminated fluid from a missed flush, or running at full pressure during break-in. Avoid by pre-filling the case, flushing the system, and following the 40-hour break-in procedure.
Failure 2: Shaft seal leakage within 1,000 hours. Cause: shaft misalignment, shaft runout from a worn coupling, or rough handling during installation. Avoid by using a dial indicator for alignment, replacing the coupling if worn, and avoiding side-load on the shaft during installation.
Failure 3: Bearing failure within 3,000 hours. Cause: severe misalignment, contamination from the system, or a manufacturing defect in the replacement pump. Avoid by using a laser alignment tool for installations where the bracket is known to be uneven, and by sourcing the replacement from a manufacturer with documented quality control.
Failure 4: Cavitation within 100 hours. Cause: inlet restriction (clogged strainer, undersized inlet pipe), wrong rotation, or fluid that is too viscous at the operating temperature. Avoid by verifying the inlet pressure is positive at the pump inlet port, confirming the rotation matches the model code, and using the fluid viscosity grade recommended by the system designer.
All four failure modes are avoidable. The cost of avoiding them is 30-60 minutes of careful installation work and 40 hours of break-in operation. The cost of not avoiding them is a replacement pump plus the labor to swap it in, repeated on a shortened cycle.
Send Us Your Old Pump Model for Free Cross-Referencing
If you have a Denison T6 pump that needs replacement and you are not 100 percent confident in the model code on the nameplate, send us the code plus a photo of the nameplate. Our engineering team will cross-reference the code to the current Veljan T6C, T6D, or T6E production part and confirm the replacement in writing before you place the order. The cross-reference is free and usually takes one business day.
For a faster turnaround, include the displacement (in cc/rev), the shaft type, the rotation, and the fluid type with your inquiry. With those four data points we can identify the correct replacement pump even when the nameplate is unreadable.
Send Your Old Pump Model for Matching
Tell us the model code (or the displacement, shaft type, rotation, and fluid type) and we will confirm the exact Veljan T6 replacement. Free cross-reference, one business day turnaround.
Frequently Asked Questions
About the Author
Demi Ge is a hydraulic solutions expert at Vicks Hydraulic, a national high-tech enterprise founded in 2007, specializing in vane pumps, servo systems, and one-stop energy-saving hydraulic solutions. With 6 world-leading production lines and an annual capacity of 80,000+ vane pumps, Vicks serves industries including marine, military, and industrial automation.
Demi is an expert in high-pressure hydraulic technology, helping global buyers source CCS, DNV, ABS, BV, and LR-certified components from a presiding industry standard revision unit.
Related Products & Resources
T6/T7 Replacement Pumps →Veljan Denison T6C T6D T6E High Pressure Pump →Send Your Old Pump Model for Matching →
Post time: Sep-04-2026